Sunday, July 29, 2012

freezing in the summer


In an attempt to embrace the fact that I am 27 going on 40 something, 
I recently started stocking and freezing some food. This is something usually reserved for those who have children, lived through the Great Depression and/or are doomsday preppers. I am none of these. 


This takes planning and thinking ahead. And while those are not generally words or phrases that describe me (due to my moderate ADD),  I'm proud to admit that I can sometimes fake it and convince people that I'm borderline "type A" (due to my mild to moderate OCD).  Obviously this is only successful in short intervals because after too much time with me they will realize that my keys are locked in my car, I left the oven on and my phone is dead. The only thing "type A" about me is that I have some seriously "great" idea and… that.is.where.they.stop. Not after spelling out these "great ideas" in detail to my husband Nate of course. The trick is to wait until you are in the car with your victim to start your rants and ramblings, so there is no escaping. Your welcome. 


 I washed and dried the fruit and spread them on pans. 
Flash freezing the fruit keeps it from sticking together in a big clump. 
I bagged it up and will use it this fall/winter for smoothies, muffins etc.


It's cheaper to buy produce when it's in season and either local or at least grown in the US. 
This is especially true when you're buying organic,
which I definitely do with berries and most produce of which I eat the skin. 

Click this link http://www.ewg.org/foodnews/summary/ for a full list of produce that you should always by organic and those that you can save some money by buying conventional. 


I need more blueberries! 


It was hard not to eat them all!


Rasberries and the rest of the strawberries. 

It was so easy!!

I also froze chopped celery, onion, jalapenos, pineapple, lemon wedges, cooked shredded chicken and ground beef over the course of a week. 


I'm torn. 
I'm trying to get away from using plastic in the kitchen BUT ziploc bags make so much sense. 
Since the bags are not getting hot there shouldn't be the worry of chemical leaching but 
tossing them is wasteful. ugh! Sometimes I rinse and reuse them but I wouldn't rinse them with hot water and then put food in them. double ugh!!


Anyways... I love this whole freezing thing, because I rarely use up all my produce when cooking. Now I can just grab what I need from the freezer. It makes cooking quicker and less wasteful. 
Most of this was grown locally, organic or both. I love supporting local farms and knowing where my food comes from. Freezing helps you do this in the winter months too. 

I found Andrea's site Simple Organized Living to be most helpful when tackling the freezer. Also check Lisa Leak's blog series "preserving seasonal foods" from 100daysofrealfood.


Oh and this is what happens when you chop 6 or so jalapenos without wearing gloves or washing your hands thoroughly. I also don't recommend scraping out the ribs and seeds with your fingers. I was just trying to be on with my food :) 
rookie

After scouring the entire and asking for advice on facebook, I coated my hand in oil, butter, soaked it lime juice and found temporary relief in a tub of sour cream. As you can see I was desperate. 
I ended up "sleeping" with my hand in a bowl of ice water all night. 
Needless to say I will not be doing that again. 

Monday, May 21, 2012

sHaKiNg hands with REAL food

I had no idea what I was getting into when I repinned a pin on Pinterest about 3.5 months ago. The picture featured a platter with cheese, lettuce, tomatoes, meat, cilantro and homemade pita chips. The comment below said "100 days of no processed food recipes." Clicking on this photo was a no brainer, considering my love for mexican food and the idea of eating healthy. I say the idea because, while I wasn't eating fast food or tons of meat, I was eating a lot of sugar and prepackaged "foods." 


I clicked on the link and briefly looked through Lisa Leake's Blog: 100 Days of No Processed Food.  I checked out some recipes and scoured the rules of the 10 Days of No Processed Foods challenge for exceptions and potential loopholes. Nothing. This was no joke. No artificial anything. No sugar. No prepackaged food with more than 5 ingredients. The rules continued…and in no time I was back to wasting time on Pinterest.


Weeks passed but I couldn't seem to shake this whole idea of not eating processed food. Was this something I could actually do? At the time I was eating like a full grown kid. Lucky Charms, Fruit-Roll Ups, Lunchables and Oreos were among my staples. And I can't forget the Handi Snacks. I would literally stuff my face in the plastic so I could lick all the cheese out. I always justified my boxed food addiction by staying on top of the latest diet fads. I made sure to supplement the junk-food with Fiber Plus granola bars and Fiber One cereal. I always opted for multi-grain crackers, wheat bread and baked chips. I chose low-fat and fat -free options. See how wise I was? (or so I thought) 


As more weeks passed, I periodically clicked back to Lisa's blog and continued to ask myself if I could do this. I settled on the possibility that it was too extreme and that I would be fine if I just ate everything in moderation. Ha. Define "moderation!"


Each trip to the pantry or grocery store brought more questions and curiosity. I started reading labels….differently.  I read labels before because, like I said, I was on top of the "nutritional" trends. I needed to know which of my colorful cereals had less sugar and more fiber. I also made mental notes of calories and serving sizes.  I usually lost those notes :) This time, however, I was reading the ingredients of the food I was buying. That. was. all. though. I read them. I didn't read them and put them back. I just processed the information. (no pun intended) I bought these foods that contained ingredients that I couldn't pronounce and made excuses for eating them.


Then one day the lightbulb went off! I figured out how to be "healthy" AND eat processed foods. I would just eat only "organic." It was perfect. I could still eat sugary cereal and even oreo-like cookies and it was seemed so much better for me. I just compared the organic varieties and picked the one with less "stuff" in them. It was perfect. Well, it was at least easier and it settled some of my worries. 

http://michaelpollan.com/books/in-defense-of-food/

So I thought….
I couldn't stop thinking about food. ingredients. health concerns. pesticides. antibiotics. I had so many questions and I knew just because it said "organic" on the box, it didn't mean it was REAL food. So, I began reading Michael Pollan's book In Defense of Food as recommended by Lisa Leake. I couldn't put it down. I told anyone would listen who was breathing about the things I was reading. There was so much I didn't know. And so much that I knew or thought might be true but filed away for sheer convenience. I began scouring the internet and library for as much information as I could find. (We live a block away from the library and it is the most wonderful thing!) Aside from a short period of food anxiety, I was really coming around and beginning to realize that I could cut out most processed foods. 

http://www.takepart.com/foodinc


After finishing In Defense of Food, I checked out the documentary Food, INC.  I vaguely remember ignoring this movie when it first came out in 2008. The truth surrounding the american agriculture, poultry, beef and dairy industries are uncomfortable, sad, disgusting and calls for action. I'm not saying that this time I was armed with spray paint and screaming "meat is murder" but I was ready…ish. So I sat down on a Saturday night to watch the inevitable emotional roller coaster. I cried, of course, over the conditions of the animals, furrowed my brow at the manipulative power houses and smiled at the happy animals grazing on a farm in Virginia. Aww:)


So was I called to action? Through these last few months of throwing myself into rediscovering food, I realized that I had a choice in my actions. My daily decisions could help the movement that takes us back to a simpler time when farmers had a say in what they did, animals and workers weren't exploited and our food came from the earth as nature intended. I could vote with my dollars by buying local organic produce and meat from humanely treated, 100% pastured animals. This means making sacrifices in my budget to allow for more expensive, quality food. It means being educated not ignorant. It means talking to local farmers, shaking their hands and thanking them for their sweat and dedication to the integrity of our food. 


Sunday, April 15, 2012

DIY bib and washcloth


I am so excited to post these pictures. It's a rare thing for me to finish something I start. Much less finish it with straight seams and few frustrating moments. It's mostly due to me s.l.o.w.i.n.g down and taking my time. Novel idea, right?


I have loved this fabric for a while but it's not great quality so I've been hesitant to use it. 
When I saw this "baby scrubbie" with the same fabric I got motivated.
I didn't use the tutorial but it's pretty similar. 


This is the pattern I used for the bib. 
She has a great tutorial for a cute scrappy bib that I hope to try.


They are going to a special little bun in the oven. 
I can't wait until he is ready for bath time and drooling!


P.s. Once it was finished I didn't even notice the quality of the fabric. It's not terrible but I'm a sucker for expensive threads. Get it? Not in my closet but definitely for sewing :) 


Saturday, March 31, 2012

Dr. Seuss Week

I'm definitely behind on posting activities from preschool. 
This is from the end of February/beginning of March.

Dr. Seuss week was very exciting for me and the children in my class. 
I was amazed and impressed at how well they listened to the stories. 
Many of them are very long for two year olds. 
They seem even longer to me when reading them back to back. 
Some of our favorites were The Cat in the Hat, One Fish, Two Fish…, Green Eggs and Ham, 
Oh the Thinks You Can Think, The Foot Book, 
There's a Wocket in my Pocket and Mr. Brown Can Moo, Can You?
This is our Bulletin Board outside our room. 

I think my favorite moment during the week was when one of my funny 
little boys put on a stethoscope from our dress up area and said 
"I'm Dr. Seuss!"  


Free Art 
This is art where the children create whatever they like.


I love these bright paintings. 


They painted, while I read Oh, the Thinks You Can Think.


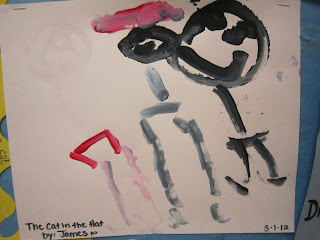
These are some drawings of The Cat in the Hat. 


Handprint Keepsakes

I don't call these art because the children have little or nothing to do with the final product. 
They put on the eyes but that's about it. Still, the children enjoy seeing the final product and parents love them. I try to throw one into every unit. This one got two! 

Thing 1 and Thing 2 from The Cat in the Hat
I got the idea here.


One Fish, Two Fish, Red Fish, Blue Fish
I've done this for a while so I don't know whom to credit.  
'

This is our version of a "Cat in the Hat" snack. 
Cool whip and red jello! 

Even though this snack is low in fat and sugar, it's not very natural. 
Layered strawberries and yogurt would be much healthier but this was a cheaper option. 
Sometimes we have to make that choice. 

It would also be cute layered in clear cups.


Sunday, February 12, 2012

Fabric Wrapped Cork Board

Challenge?  Add texture, color and functionality to an uninspiring blank wall.
Solution?  A cork board!? I bought a plain cork board with intentions of covering it with batting and fabric and using ribbon to hold pictures, notes, etc. 
Not wanting to make the traditional boars with criss cross ribbon I did some experimenting. 
An art teacher once told me that you should avoid your first instinct when designing, drawing and/or creating. With that always in the back of my mind, I try to play around with my material (literally material in this case) and see what I can come up with.
After some trial and error and removing staples with pliers from failed attempts, I came up with this.


I wraped folded pieces of fabric across the board lengthwise and stapled it to the back. I used very small scrapbooking brads to hold some of the fabric down and create divisions. They are hard to see in the photos and not very functional. 

I'm going to try decorative upholstery nails and maybe add some ribbon. 


First, I covered the board with batting. I stapled the fabric to the board and not the frame as shown here. It was much easier that way.


 Then, I covered it in a solid piece of fabric. I just used a cheap piece of white fabric I had lying around. 

 To create a neat corner, I first folded the corner into the middle and stapled. Then I folded each side in, pulling tightly to create a smooth edge with two neat folds.


Keeping my fabric folded in half, selvage to selvage, I cut multiple strips. I  started with 6 fabrics and cut two pieces of each. I only ended up using 5 different fabrics but it's good to have more than you need. 
I cut various widths, so the finished layers would not be uniform. I cut all the strips 5 or 6 inches wide or more. Whatever size you choose, your finished strip will be half that size.

Scissors would work just as well, but I love my rotary cutter.


Open the fabric and iron it flat. 


Then fold the fabric in half and press to make a long skinny strip. 

Continue until you have a enough strips to cover the board. 


Layer and staple each layer down. 


Staple the ends to the back, tightly.


Pleat the corner.


Add more staples for security and trim up the back.

There you have it. 


I finally finished it. 
I added navy ribbon and brass upholstery tacks. They were cheap- $2 for a box of 24. I was able to push them in easily with my fingers and they seem very secure. I put in the tacks first and then stapled the ribbon on the back. 


Then I accessorized :) my now "inspiration board" with some tools, pictures and my cute Vera Bradley Calculator form my Mama. It serves more form than function but I'm sure it really works.


Sunday, January 22, 2012

Playdoh Creatures and My Favorite Playdoh Recipe

These little creatures were the result of me 
suggesting that we make snowmen with playdoh. 


Making snowmen was not a hit for a few potential reasons:


1) The playdoh was "black." The colors of the month were black and white and we had only made "black" thus far. We ran out of black food coloring and I didn't want to mix other colors and end up with a pile of poo playdoh. That happened. It was weird. So this was more gray than black. I try to use these opportunities to teach my children about colors beyond ROY-G-BIV. Like charcoal gray, army green, navy blue and camel. The best is when they get them confused. Navy green. Sheep. (because sheep and camels are similar :) ?


2) Balls are hard to make. Especially ones of different sizes and stack on top…forget about it. 


3) It was sunny and hadn't snow yet this year. 


So…… since kids are resourceful they made monsters which (not pictured) later became robots when placed on the forearm. 


I thought these little monsters were especially charming.


Oh, it was also someone's birthday. That's nothing new, though.


This is my personal favorite playdoh recipe. Yes, you have to cook it. 
It kind of sucks but cooked playdoh is much nicer and less messy. 

Playdoh

3 cups warm water

Food coloring

3 cups flour

1 Tablespoon Cream of Tarter

3/4 cup salt

3 Tablespoons Vegetable Oil


Combine warm water and food coloring and set aside. 
Combine all ingredients, add water mixture and stir. 
Cook over medium heat. Stir continuously until it is the consistency of mashed potatoes and pulls away from pan. (I tend to cook it longer- until it is a  ball of dough)
Remove from pan and knead. It's very hot so I knead it with a piece of wax paper on top. You could probably wait until it cools but that's boring. 
Store in an air-tight container, once it is completely cooled. 
Keep until it smells bad or look gross.


This is the recipe we use at work. There is no source, so I can't credit anyone. I'm sure there are others that are very similar but this one works so I haven't looked recently to compare it. 

Sunday, January 8, 2012

a turkey baster does what?

I couldn't decide what to write about for my first official post. 
So I thought I'd make it easy on myself and post about something I already had pictures of! 
Here is a fun color-theory activity that I did in my classroom. The only thing I hate is cropping out my kids' cute faces since they're not actually my children :)


I just threw in the term 'color-theory' because it sounded impressive, especially for two year olds. Some of them got it but it was more than just "yellow and blue make green."
 (of course I was so excited when they could tell me that!)


Turkey Basters seemed like an obvious choice since it was November and we were talking about turkeys. While it makes sense to us as adults, there is very little connection between moistening a turkey while it cooks and a plastic toy that makes a huge mess when you squeeze it! 
Save your breath and skip the culinary lesson :)


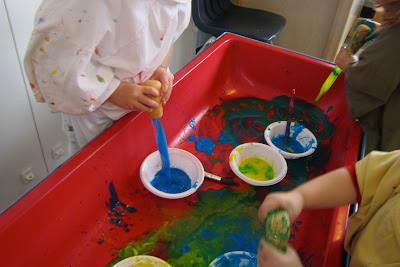
I put bowls of yellow and blue paint in the sensory table. I mixed in a little water so it would be thin enough to go in and out of the baster. I gave them the basters and showed each of them how to squeeze it before putting it in the paint and then let go. It was tricky but they got the hang of it. 


Paint brushes were requested since we were in fact using paint. (so literal sometimes) Hands are always encouraged and are usually the painting tool of choice. We saved the green (more like teal) paint we made and will use it another day. 

Developmental Areas:
sensory, discovery, science, fine motor, cause and effect and more